When I’m Steaming Timbers

Careful with that angle grinder

Thwarts off, timbers next

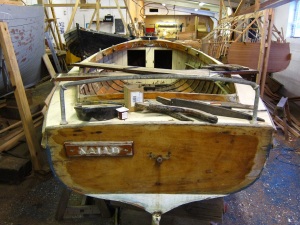
“It says here ‘conservation importance HIGH’ ” shouted Michael, reading from the folder of notes on Naiad’s restoration. “What?” I replied above the din of the angle grinder I was using to remove a rove from one of the nails that holds Naiad’s clinker planks together; suddenly the super-heated copper rove flew off and landed on the back of my hand. Michael shook his head; “Just be careful”. The first proper project that Michael and I have been given in the boat shed seemed to involve taking a boat to bits, rather that building it.

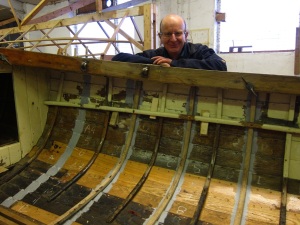
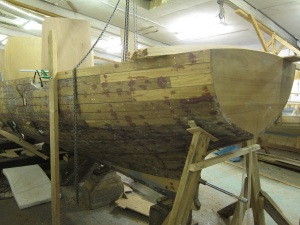
We had removed the thwarts and were now removing the old, damaged timbers from Naiad; one of few remaining Aldeburgh One Design dinghies built by Everson of Woodbridge. After removing the roves (carefully), one of us drove the nail through from the inside of the boat using a nail punch, while the other supported the plank from the outside and helped the nail out. Sounds easy, but we’re starting to expect complications with old boats, and of course many of the nails were bent, or inaccessible etc. so there was plenty to keep us occupied.

When we had pushed, pulled, coaxed and dug out enough nails that we could remove a few alternate timbers from one side of the boat (it’s important to keep enough in place to keep the shape of the boat intact), it was time for the exciting bit. I had previously imagined that a fair proportion of my time at IBTC would involve steaming wood into various interesting shapes, but it now seems apparent to me that steaming is very like painting, in that 90% of the time is spent in preparation and the main event is over in a flash.

Steaming steam box

Timbers cooking

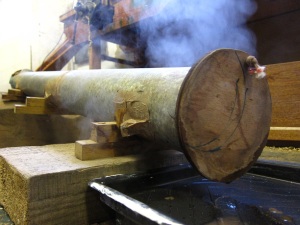
We fired up the steam box (a wallpaper steamer attached to a metal tube), and when it was hot enough, put our green oak timbers into the tube. Thirty minutes later, oven gloves at the ready, and Rob the tutor in attendance to make sure we didn’t mess it up, we pulled out our first hot timber. Michael bent it round his knee like an oversized piece of spaghetti and pressed it into shape inside Naiad’s hull while I screwed it into place from the outside; a temporary measure to allow it to take shape (the timbers will be nailed and clenched with roves later). We whizzed through our supply of timbers in the steam box and then stood back to admire our work. Now the process starts again; knocking out nails and scraping off old varnish and tar. There are plenty more timbers to replace, but at least we’ve put some of the boat back together.

Michael and timbers

Michael and timbers

Sex in Wood

Leila

Leila – you’ve got me on my knees

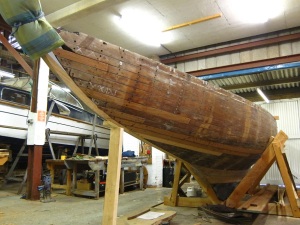
It has to be said that Leila looks her age; she’s over 100 years old. The rot has set in; she’s lost her sheen and has undergone some unflattering surgery in the past. But there’s something about Leila; ‘sex in wood’, as Pete the tutor described her in our tour of the boat yard this week. After quietly thanking Pete and the patron saint of blogs for the title of this post, I took some time to stand back and properly appreciate her. When you look beyond her ageing and damaged planks, she looks fast, deft and sleek. She has an elliptical counter, lots of overhang, a bit of tumblehome, a curvaceous turn of the bilge, very little crop and a wineglass transverse section. I know this because this week we had naming of parts (or boat terminology) and there’s lots of it, so I’ve started writing a glossary to keep track of it all; but let’s concentrate on the boats for now.

Leila is a six metre class yacht designed by William Fife III, generally considered to be one of the greatest boat designers of all time, and built in 1912 at Fairlie on the Clyde; it seems incredible that she’s so old. She was found by her current owner rotting away in a timber yard. One of the most elegant features, her counter stern, had been cut away (probably because of rot); but this will be rebuilt as part of the restoration.

Leila is not the only beautiful boat at IBTC. There’s Cloud, a new build of an Albert Strange design that won a Yachting Monthly design competition in 1908. She has carvel planking in iroko wood, a spoon bow, a canoe stern and a wineglass hull section.

cropped-img_0805.jpg

Then there’s Germaine, a restoration project who appears in scantlings’ masthead picture sometimes. She’s a carvel pilot cutter built by Camper & Nicholsons in 1882, she has a nice forefoot and a counter stern (in common with Leila).

That’s enough boats for now; there are plenty more in the boat shed to talk about when I get to know them a bit better (probably by taking them to bits). Now I think I’ll go and have another look at Leila.

From the Depths

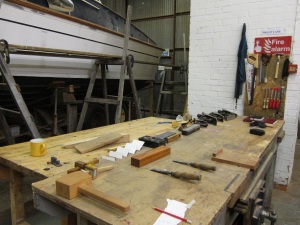
My new bench

My new bench in the boat shed

I’ve been working on a real boat at last. I moved over to the boat shed this week and started at the bottom. I spent Friday morning lying underneath the hull of Profundis doing ‘snagging’ work, which involves knocking the ends off wooden plugs with a chisel and filling holes with a combination of epoxy and microballoon filler. Once the snagging is done she’ll be ready for her first coat of primer.

Back from the depths

Back from the depths

Profundis is thought to be an ex-Admiralty steam powered tender from around 1900 and is being converted into a weekend river cruiser. The name Profundis has some breadth as well as depth; it refers to the fact that she was rescued from the depths of the Thames at some point in her history; it comes originally from a Psalm (‘De Profundis’); which has inspired lots of works including several poems, album titles, the name of an extreme metal band and was the name given to a letter written by Oscar Wilde from Reading prison which contains plenty to reflect on from the floor of the boat shed.

Beam me up Scotty

Can dovetail joints get any more complicated?

Can dovetail joints get any more complicated?

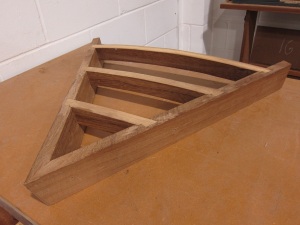
Happy New Year. I’m back at my workbench at last. It isn’t the same bench that I left 3 weeks ago; the joinery shop has moved next door in order to make room for more boats that need to be fixed. What hadn’t changed was the beam shelf to which I had been attaching deck beams before I left. It’s quite a complex task; complicated dovetail joints with all sorts of strange angles. We were warned that we would need to take notes while doing the first one in order to be able to do the rest. I had taken notes but somehow they didn’t mean much after 3 weeks. I spent the first morning just looking at what I’d done in mid-December, reading some meaningless sentences and diagrams and scratching my head.

Done at last

Done at last

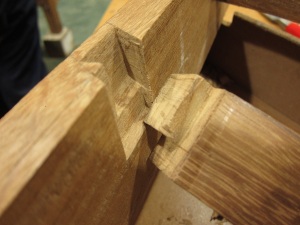
Deck beams are used to support the boat’s deck, and help to support the sides of the boat. They are attached to the upper edge of the boat’s sides (known as gunwales until the deck beams are attached, at which point they are referred to as beam shelves). They have to be constructed in accordance with Lloyd’s rules for scantlings which are determined by the dimensions of the bits of wood used to build the boat. These dimensions are referred to in the boat building world as ‘siding’ and ‘moulding’; the siding of a beam is its horizontal thickness or width and the moulding is its vertical depth of the beam at any point along its length. Where a beam meets a beam shelf there is a convergence of several angles; as John Leather says in ‘Clinker Boatbuilding’:

Setting out beam end joints requires careful thought as the gunwale  or shelf is usually not vertical but raked outwards, and the sheer further confuses clear appreciation of the approach.

He didn’t even mention the fact that the beam itself is curved! (known as its crop). Our mission was to attach the deck beams to the beam shelf using half dovetail joints. The problem is that you don’t really know whether you’ve done it right until it’s done.

Projecting lines

Projecting line.

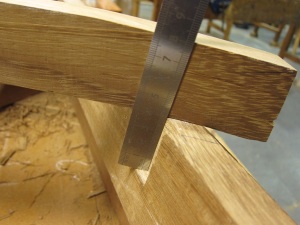
At least one extra arm would have been handy. The beam has to be held vertically above the beam shelf while the required angles are projected between the beam and the beam shelf using a straight edge. It’s a leap of faith as you cut a homelet in the beam shelf to support the beam, cut a half dovetail on the beam and project its shape into the shelf. One or both of the dovetails has to then be tapered otherwise the beam won’t go into the beam shelf because of the rake of the shelf. Then its a matter of looking for points where the surfaces rub and easing them so that eventually the beam drops into place. Then it’s on to the next one. After I’d done three beams, Jon asked me if I was now confident about doing them; I think ‘yes’ was the right answer as I didn’t have to do any more.

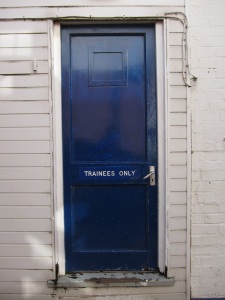
A new group has started in joinery this week, good luck to them all. There’s lots to learn, but Ian and Jon are there to guide them through as painlessly as possible. I think the ‘how flat is flat?‘ discussion has started again already. I’ve almost finished my joinery projects; so I should be over in the boat shed (aka ‘the Dark Side’) by the end of this week. At last I’ll find out what happens behind the blue door …

Portal to the dark side

Portal to the dark side

Shock and Oar

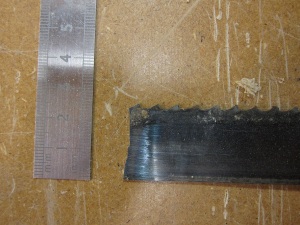
Broken weld - now redeployed as a handy straight edge

Broken weld – now redeployed as a handy straight edge

The woodworking industry has one of the highest accident rates in manufacturing. Circular saws are very dangerous (30% of accidents), followed by planers (20%), spindle moulders (15%) and bandsaws (10%). They’re all just waiting to have your fingers. We’ve been doing some machinery safety training in preparation for the fact that the reality of boat building isn’t all about spending days and weeks with a hand plane and chisels, however idyllic that might be. Basically you shouldn’t go near a machine without a couple of push-sticks to prod the work through and keeping your hands well out of it. I almost found this out to my cost this week when I used a band saw to cut some waste from my oar. I had it all lined up and ready to go when the weld that joins the ends of the saw blade together failed and the blade spewed out of the machine quite dramatically. Luckily I’d just had my training, and Jon was keeping a close eye on what I was doing, so my hands were well out of the way of the blade. The brake kicked in and stopped the machine quickly, but it was a good lesson learned; a bag of flesh isn’t much of a match for large woodworking machines.

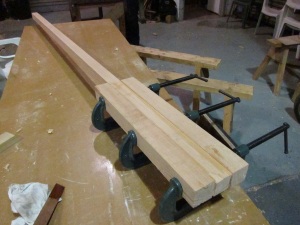
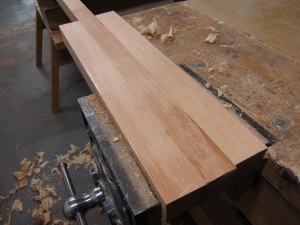
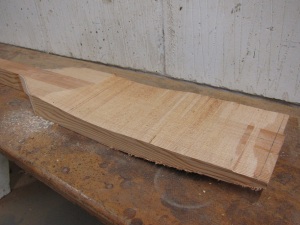
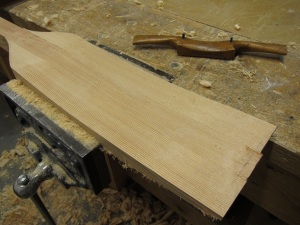
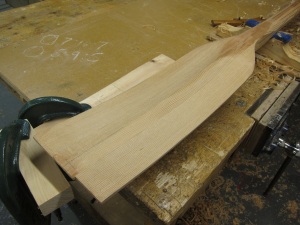
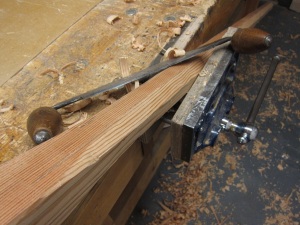
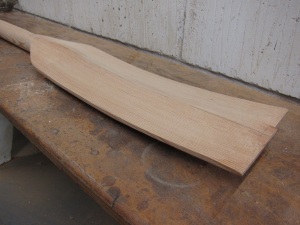
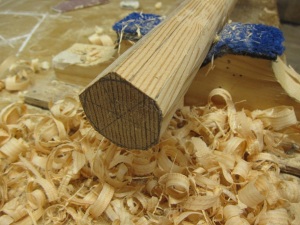
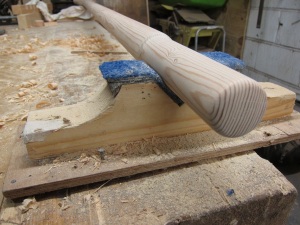
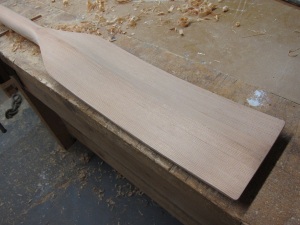
Back in the relative safety (only the occasional plaster) and quiet of the joinery shop, I spent the rest of the week with my spar gauge  planes, spoke shave, draw knife and 3 grades of sandpaper fashioning my Oar1 Oar2 Oar3 Oar4 Oar5 Oar6 Oar7 Oar8 Oar9 Oar10oar out of three pieces of spruce that were glued together. It really does seem miraculous to see the curved shape of the blade and the cylindrical shaft emerge from a block of wood; more like sculpture than joinery. It does take a long time though; but now it’s finished (minus 1 coat of varnish) so at least I’ll be OK next time I’m up the proverbial creek (which isn’t usually a very long wait).

Joiner’s Toys

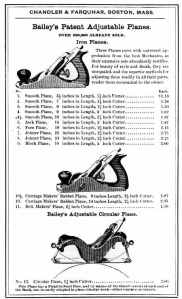
Catalogue of Chandler and Farquhar, Boston, 1900. Smithsonianphoto 55798.

Catalogue of Chandler and Farquhar, Boston, 1900.

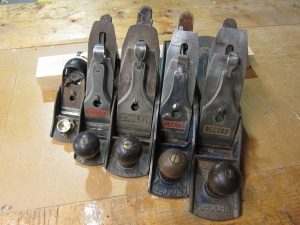
Like many male dominated pursuits, there is a degree of kit fetishism involved with joinery; which in the case of class 111 seems to be centred around planes. There’s a lot of interest in older planes in the group as they can work as well as, or better than new products. Beautiful new planes can be bought from companies such as Lie-Nielsen and Clifton, but the basic principle of operation hasn’t really changed for hundred of years. The earliest known planes date from the 1st century AD, and modern planes would probably be recognisable to a Roman carpenter. The iron bodied Bailey planes shown in the Chandler and Farquhar catalogue on the left were first introduced in the 1870s, and most of them can still be bought as Stanley or Record products with exactly the same design, dimensions and product numbers.

It’s amazing what you can do with a plane. I started off with a cheap no. 3 smoothing plane that occasionally saw the light of day when a door was sticking. Because I never sharpened it, it generally did more harm than good. Now I’ve built up a bit of a collection of old planes; some have been given to me by friends that have found them in sheds, some have been bought for a few pounds at tool sales and some cost a bit more. In the joinery shop we’ve used them in a variety of different ways in the past 12 weeks to create flat surfaces, perpendicular edges, angles, curves, bevelled edges and sometimes just to get rid of waste wood. We’ve used them to make boxes, mallets, bench hooks, oars and even more planes.

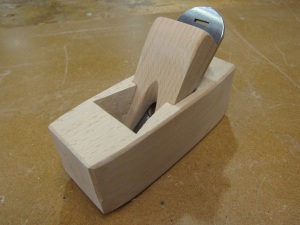
The latest addition to my plane collection - a bollow plane

The latest addition to my plane collection – a bollow plane

I’ve just finished making a bollow plane in beech, which will be used to scoop out the blade of a spoon oar, which is my next project. With my bench hook, mallet, dovetail gauge and spar gauge, I’ve now got a small collection of tools I’ve made myself, which provided a feeling of self sufficiency until I remembered that I needed a plane to make the plane and a mallet to make the mallet. So now I’m just wondering how they made the first one.

Zac using Andreu's old wooden jointer plane

Zac using Andreu’s old wooden jointer plane

My plane collection

My plane collection

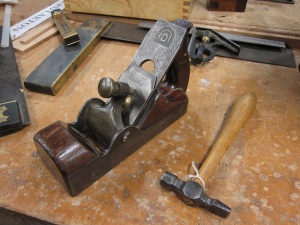
Edward's Mathieson plane with precision adjustment tool

Edward’s Mathieson plane with precision adjustment tool

Grate Expectations

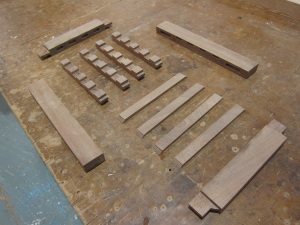
Rails, stiles, ribs and slats

Rails, stiles, ribs and slats

I always have great expectations of the next joinery project. This time it will be perfect and I will defeat the demons. In order to do good joinery, you need to mark out the lines accurately and then cut along the lines. How hard can it be?

This week I’ve been making a proper boat thing; it’s a mahogany floor grating and is the sort of thing that might be used in a boat’s cockpit, heads, shower or galley to allow water to drain away and keep your feet dry(ish). The grating consists of a frame made up of two stiles and two rails joined together with haunched mortise and tenon joints (the haunch hides the tenon from view on the outside edge). Our gratings have four ribs, which are attached to the rails with stub tenons (i.e. little ones) and four slats which are attached to the stiles with tiny beaked tenons. It was all going well; in fact it’s quite engrossing marking out and cutting all the joints; but I was conscious that it was taking rather a long time. That’s the notion that I need to remind myself always leads to things going wrong. The slats need to be recessed into the ribs; four ribs and four slats require 16 intersections between them. I decided that it would be much quicker to put all the ribs together and cut out all the recesses for the cross halving joints in 8 cuts rather than 32. The problem was that I sacrificed a good deal of precision on the altar of speed as I found out when I put them all together, so now I’ve got big gaps between my ribs and slats. Another lesson learned (again); the application of patience is inversely proportional to that of Brummer.

Class 111

Class 111

People have started to disappear from the joinery shop. Andreu and Edward have gone over to ‘the dark side’ (as the boat shed is generally known). We also said goodbye to Jonny; he’s gone off to start working in a boat yard further up the coast. We saw them off in fine style at the Commodore with a slap-up lunch followed by an afternoon and evening lost in a haze of Adnam’s Broadside and reminiscences of the last 12 weeks; we laughed, we cried, we hid Zac’s shoes …

Little boxes

Small tool box (repaired mitre joint on bottom right)

There’s always a new challenge in joinery; having mastered completed some big, bold dovetails in hardwood (mahogany), the next two projects involved making some much smaller ones in softwood (Canadian pine). It sounds easier, but it isn’t. Cutting a dovetail in softwood is a bit like cutting it in polystyrene. It breaks away, and you end up with something that doesn’t look very precise at all. Like all good carpenters I decided that the best thing to do was to blame the tools, so I switched from my trusty tenon saw to a Japanese dozuki saw with a blade like a razor blade. Unfortunately, like all saws, it only does what its user makes it do. My first indication that the wood demon had struck again was Jon saying “where is the mitre joint?”. On the floor of the joinery shop, that’s where. Time to reach for the cascamite; if you squint you can hardly see the join. I need to tame the dozuki or make friends with my tenon saw again.

Tool tray with handle based on two £1 coins and a bent bit of plywood.

Varnishing Act

The Wood demon menacing Michael courtesy of Jonny

The wood demon can attack any time in the joinery shop; he’s always on my case. After spending days ex-foliating my tool box with block plane, cabinet scraper, 150 grit and 240 grit sandpaper, in a moment of madness I rolled my tool box on it’s back without securing the lid properly. The lid flew open and landed on a plank of wood that was in the vice as a back-stop, and there was a dent in my previously perfectly flat lid; more damage to fix, time to reach for the Brummer yet again.

Brummer covers a multitude of sins

A more subtle way to defeat the wood demon

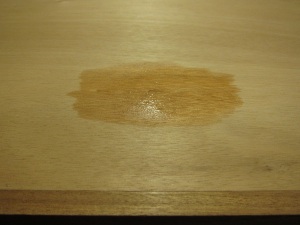
Fortunately, Jon, Ian and Tim are experts at fixing the damage done by us students. Jon suggested that I soaked the area with water so that the crushed wood in the dent would expand, and sure enough it did. I’m sure they see the reversed mitres, sawn off dovetails, missed saw lines and general messiness time and time again, but it feels like a disaster when it happens. Sometimes we’re not completely to blame; wood twists and warps according to the temperature and humidity, so something that you thought was straight is suddenly warped or has wind in it, you need to work out whether to work with it as it is or force it back into shape. Dealing with the wood demon is a vital skill for boat building, I don’t think he’s going to give up in the near future.

Half a coat of 50:50

Getting my box ready for varnishing went on for days;  I was covered from head to foot in sawdust, fingers dry and split and gasping for the next tea break. “It’s getting there” said Tim at regular intervals. It’s not as if the box is that big; what would it be like to do a whole boat? At last I passed the inspection and was lead upstairs to the varnishing room. It’s warm and there’s no dust; but you have to get the timing right because once you start you’ve got to keep going, so tea breaks come and go as you look on with sticky hands and a precarious state of partial coverage. Across the grain first, then along it, keep moving so that it doesn’t run. Only 2 more coats to go.

On the shore of Lake Lothing

One of the pleasures of learning boat building at IBTC is seeing, and sometimes participating in, the comings and goings in the local boat yards along the shore of Lake Lothing .

Tarring Albion’s hull

This week, Jonny arranged for us to go and have a look at Albion; a Norfolk wherry currently in a boat yard a short walk along the shore. Albion was built in 1898 on this same shore in Oulton Broad, and carried sugar beet up until the 1950s when it was no longer economic to transport goods around the broads by boat. Nowadays she earns her keep as a charter boat; she’s been fitted out with accommodation for 12 and is available for charter from the Norfolk Wherry Trust. Some sections of her planking have been replaced and she is being given a new coating of coal-tar, about half an inch thick which looks very robust. She’s also having her massive rudder replaced with a new built copy; a serious bit of joinery. It was great to see her out of the water in order to admire the shallow, wide hull and transverse profile like a wineglass which is reminiscent of a Viking longboat. It seems that things don’t change quickly in boat building on the east coast. Seeing the guys working on her outside in the cold October rain was a reminder of how many comfort levels I’ve still got to drop in the world of boat building. I’ve gone from my desk in a warm office in West London to standing all day at a work bench in a slightly less warm joinery shop; to paraphrase the Four Yorkshiremen: “that’s luxury”.

Hobbit in the joinery shed …

The regular shunting of boats in various states of repair around the IBTC yard on a selection of trolleys and trailers (also in various states of repair) seems like a sliding block puzzle on a large scale. We’re occasionally called upon to help push/pull boats from somewhere to somewhere else. One of them has joined us in the joinery shed to have her keel reseated; she’s a beautiful little 20ft clinker mahogany sloop called

… proving to be a bit of a distraction from joinery

Hobbit‘. She was built in 1968 to a Laurent Giles design based on ‘Sopranino‘, which was sailed across the Atlantic by Patrick Ellam and Colin Mudie in the early 1950s and inspired the development of the Junior Offshore Group (JOG), which was set up to allow small yachts to compete offshore. An ocean crossing seems an incredible feat when you see Hobbit, she’s the size of a day boat with barely room for one pair of legs in the cockpit but somehow they found room for 2 berths in her tiny saloon.

Standing around

As well as shunting boats, us joinery students have many other uses. One of the commercial boat yards called on us recently to act as ballast, we formed an orderly line and were moved around the boat as a stability test. It’s good to know where we stand (or where to stand).

Pushing, pulling, standing; what’s left? Oh yes, carrying things. Three sliced trees arrived on the back of a lorry this week, and we all mucked in to get them under cover to dry out (well, most of us …).

Anyone seen Dave?