When I’m Steaming Timbers

Careful with that angle grinder

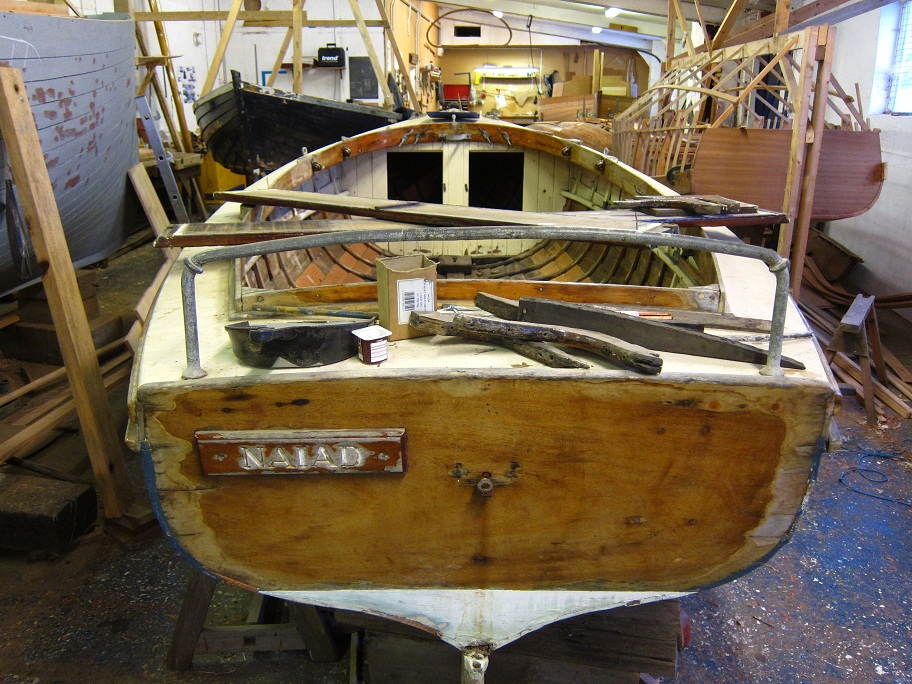
Thwarts off, timbers next

“It says here ‘conservation importance HIGH’ ” shouted Michael, reading from the folder of notes on Naiad’s restoration. “What?” I replied above the din of the angle grinder I was using to remove a rove from one of the nails that holds Naiad’s clinker planks together; suddenly the super-heated copper rove flew off and landed on the back of my hand. Michael shook his head; “Just be careful”. The first proper project that Michael and I have been given in the boat shed seemed to involve taking a boat to bits, rather that building it.

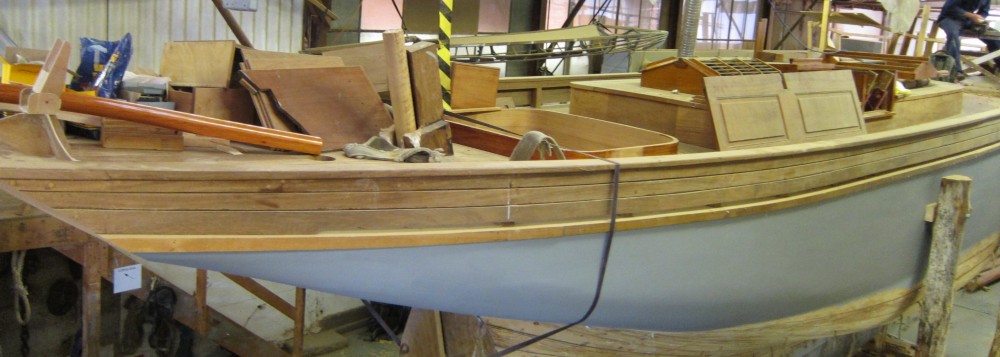
We had removed the thwarts and were now removing the old, damaged timbers from Naiad; one of few remaining Aldeburgh One Design dinghies built by Everson of Woodbridge. After removing the roves (carefully), one of us drove the nail through from the inside of the boat using a nail punch, while the other supported the plank from the outside and helped the nail out. Sounds easy, but we’re starting to expect complications with old boats, and of course many of the nails were bent, or inaccessible etc. so there was plenty to keep us occupied.

When we had pushed, pulled, coaxed and dug out enough nails that we could remove a few alternate timbers from one side of the boat (it’s important to keep enough in place to keep the shape of the boat intact), it was time for the exciting bit. I had previously imagined that a fair proportion of my time at IBTC would involve steaming wood into various interesting shapes, but it now seems apparent to me that steaming is very like painting, in that 90% of the time is spent in preparation and the main event is over in a flash.
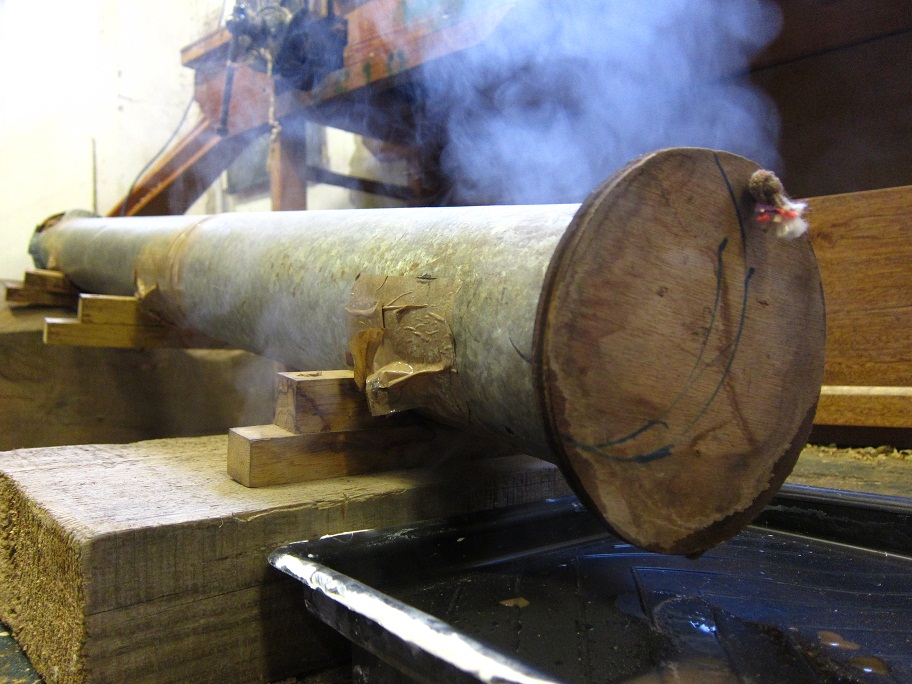
Steaming steam box

Timbers cooking

We fired up the steam box (a wallpaper steamer attached to a metal tube), and when it was hot enough, put our green oak timbers into the tube. Thirty minutes later, oven gloves at the ready, and Rob the tutor in attendance to make sure we didn’t mess it up, we pulled out our first hot timber. Michael bent it round his knee like an oversized piece of spaghetti and pressed it into shape inside Naiad’s hull while I screwed it into place from the outside; a temporary measure to allow it to take shape (the timbers will be nailed and clenched with roves later). We whizzed through our supply of timbers in the steam box and then stood back to admire our work. Now the process starts again; knocking out nails and scraping off old varnish and tar. There are plenty more timbers to replace, but at least we’ve put some of the boat back together.
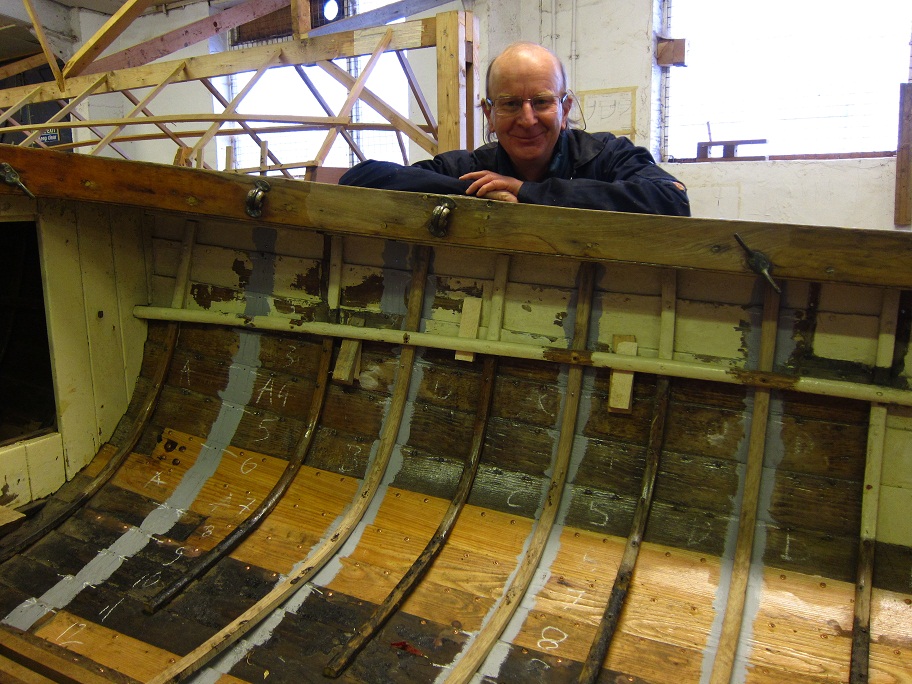
Michael and timbers

Michael and timbers

Sex in Wood

Leila

Leila – you’ve got me on my knees

It has to be said that Leila looks her age; she’s over 100 years old. The rot has set in; she’s lost her sheen and has undergone some unflattering surgery in the past. But there’s something about Leila; ‘sex in wood’, as Pete the tutor described her in our tour of the boat yard this week. After quietly thanking Pete and the patron saint of blogs for the title of this post, I took some time to stand back and properly appreciate her. When you look beyond her ageing and damaged planks, she looks fast, deft and sleek. She has an elliptical counter, lots of overhang, a bit of tumblehome, a curvaceous turn of the bilge, very little crop and a wineglass transverse section. I know this because this week we had naming of parts (or boat terminology) and there’s lots of it, so I’ve started writing a glossary to keep track of it all; but let’s concentrate on the boats for now.

Leila is a six metre class yacht designed by William Fife III, generally considered to be one of the greatest boat designers of all time, and built in 1912 at Fairlie on the Clyde; it seems incredible that she’s so old. She was found by her current owner rotting away in a timber yard. One of the most elegant features, her counter stern, had been cut away (probably because of rot); but this will be rebuilt as part of the restoration.

Leila is not the only beautiful boat at IBTC. There’s Cloud, a new build of an Albert Strange design that won a Yachting Monthly design competition in 1908. She has carvel planking in iroko wood, a spoon bow, a canoe stern and a wineglass hull section.

cropped-img_0805.jpg

Then there’s Germaine, a restoration project who appears in scantlings’ masthead picture sometimes. She’s a carvel pilot cutter built by Camper & Nicholsons in 1882, she has a nice forefoot and a counter stern (in common with Leila).

That’s enough boats for now; there are plenty more in the boat shed to talk about when I get to know them a bit better (probably by taking them to bits). Now I think I’ll go and have another look at Leila.

From the Depths

My new bench

My new bench in the boat shed

I’ve been working on a real boat at last. I moved over to the boat shed this week and started at the bottom. I spent Friday morning lying underneath the hull of Profundis doing ‘snagging’ work, which involves knocking the ends off wooden plugs with a chisel and filling holes with a combination of epoxy and microballoon filler. Once the snagging is done she’ll be ready for her first coat of primer.

Back from the depths

Back from the depths

Profundis is thought to be an ex-Admiralty steam powered tender from around 1900 and is being converted into a weekend river cruiser. The name Profundis has some breadth as well as depth; it refers to the fact that she was rescued from the depths of the Thames at some point in her history; it comes originally from a Psalm (‘De Profundis’); which has inspired lots of works including several poems, album titles, the name of an extreme metal band and was the name given to a letter written by Oscar Wilde from Reading prison which contains plenty to reflect on from the floor of the boat shed.

Beam me up Scotty

Can dovetail joints get any more complicated?

Can dovetail joints get any more complicated?

Happy New Year. I’m back at my workbench at last. It isn’t the same bench that I left 3 weeks ago; the joinery shop has moved next door in order to make room for more boats that need to be fixed. What hadn’t changed was the beam shelf to which I had been attaching deck beams before I left. It’s quite a complex task; complicated dovetail joints with all sorts of strange angles. We were warned that we would need to take notes while doing the first one in order to be able to do the rest. I had taken notes but somehow they didn’t mean much after 3 weeks. I spent the first morning just looking at what I’d done in mid-December, reading some meaningless sentences and diagrams and scratching my head.

Done at last

Done at last

Deck beams are used to support the boat’s deck, and help to support the sides of the boat. They are attached to the upper edge of the boat’s sides (known as gunwales until the deck beams are attached, at which point they are referred to as beam shelves). They have to be constructed in accordance with Lloyd’s rules for scantlings which are determined by the dimensions of the bits of wood used to build the boat. These dimensions are referred to in the boat building world as ‘siding’ and ‘moulding’; the siding of a beam is its horizontal thickness or width and the moulding is its vertical depth of the beam at any point along its length. Where a beam meets a beam shelf there is a convergence of several angles; as John Leather says in ‘Clinker Boatbuilding’:

Setting out beam end joints requires careful thought as the gunwale  or shelf is usually not vertical but raked outwards, and the sheer further confuses clear appreciation of the approach.

He didn’t even mention the fact that the beam itself is curved! (known as its crop). Our mission was to attach the deck beams to the beam shelf using half dovetail joints. The problem is that you don’t really know whether you’ve done it right until it’s done.

Projecting lines

Projecting line.

At least one extra arm would have been handy. The beam has to be held vertically above the beam shelf while the required angles are projected between the beam and the beam shelf using a straight edge. It’s a leap of faith as you cut a homelet in the beam shelf to support the beam, cut a half dovetail on the beam and project its shape into the shelf. One or both of the dovetails has to then be tapered otherwise the beam won’t go into the beam shelf because of the rake of the shelf. Then its a matter of looking for points where the surfaces rub and easing them so that eventually the beam drops into place. Then it’s on to the next one. After I’d done three beams, Jon asked me if I was now confident about doing them; I think ‘yes’ was the right answer as I didn’t have to do any more.

A new group has started in joinery this week, good luck to them all. There’s lots to learn, but Ian and Jon are there to guide them through as painlessly as possible. I think the ‘how flat is flat?‘ discussion has started again already. I’ve almost finished my joinery projects; so I should be over in the boat shed (aka ‘the Dark Side’) by the end of this week. At last I’ll find out what happens behind the blue door …

Portal to the dark side

Portal to the dark side