How I Learned to Stop Worrying and Love Epoxy

Hull ready for painting

Hull ready for painting

I put the final layer of epoxy on the canoe today. Anna followed along behind with a jenny brush to tip off any excess to give it a nice smooth finish (hopefully).

I find epoxy a bit intimidating; there are so many potential hazards in covering large areas of wood in strong adhesive. Like steaming, it’s very difficult to back out once you’ve started, so you have to try to control the feeling of blind panic. There are so many things that can go wrong with epoxy; too much hardener and the mixture heats up, and the ice cream carton you’ve mixed it in starts melting. Not enough hardener and the epoxy might not set properly; then it’s going to be messy getting it off and starting again. Then there are the environmental concerns. The epoxy resin can bears surely the most bleak of all the hazard symbols: the dead fish, tree and oil slick that indicates an environmental hazard. But only in its uncured form, we are assured. The hardener, in its own separate can, is corrosive and would probably also kill its share of fish and trees if it got out on its own. But nothing else quite compares to it for strength and water resistance, which is why it is found in many industrial and marine applications. It seems to be early days for green alternatives and I haven’t seen any evidence of their use in boat building applications. I’ve got through a gallon of epoxy make the canoe and it doesn’t come cheap, but it’s a ubiquitous material in modern boat building. I’ve used it for gluing planks and other joints together, forming the backbone, filleting and bonding fibreglass and filling holes. But for now I can put it away and stop worrying about it.

Split Ends

PlywoodIt’s exactly a year since I started building my wooden canoe. It was supposed to be launched in the spring, to be followed by a summer of idyllic days out on a succession of rivers and lakes. If there is one thing I should have learned from my year at IBTC, it is that anything to do with wooden boats takes a lot longer than you think it’s going to. After 3 months it looked like a boat; since then I’ve just been ‘finishing it off’. But that’s the bit that takes the time.

steamerIt is said that the art produced in many cultures contains deliberate imperfections as only god can be perfect. I haven’t had to worry about where to introduce imperfections into my canoe, as despite aiming at perfection, they have frequently found their way in. The weekend before last I thought i’d finished the last components, two curved ash trim pieces for the edges of the decks. These trim pieces are a good example of why wooden boats take so long to make. splitEndStarting with a lump of ash, they had to be sawn to length, planed to thickness, routered to profile, steamed to fit the curve of the deck and secured in position when they dried out. I was ready for a minor moment of celebration as I secured the second trim piece in place with my well-used g-clamps, but it turned into another mini-disaster as it started to split in two along its length. Another day lost in making a replacement, another lesson learned: making a spare at the same time as making the first two would have been quicker than starting from scratch. I’ve made a new one now, so the hull is now complete. Now I’ve just got to paint and varnish it; just finishing it off.

In Her Element

Germaine In Boat HoistIt was a slow journey from the back of the IBTC boat shed to Lake Lothing. It took several days for Germaine to travel the 100 yards or so out of the shed and back into the water. She’d waited 16 years and at 11.00 last Tuesday morning she was back in the water. Awakened at last she made her way across the lake as we watched in admiration.

Germaine On the Move

The first stage of her journey started a couple of weeks ago. Her way was blocked by an accumulation of boats of various shapes, sizes and degrees of portability. When they had been lifted, pushed, pulled and rolled out of the way (see Henry’s brilliant shed shuffle), Germaine was ready to glide out of the shed on her wooden cradle. We felt like an Egyptian chain gang as she slid along on greased boards which had to be carried from back to front, but we had some some help from a digger and a for lift truck, which eased the load somewhat. She slid out of the shed and along the hard to the yard next door where she reclined in her cradle for a few days to wait for the big day.

She needed a few last minute adjustments of course, and we carried on working on her out in the yard despite the rain. My contribution was very minor, just attaching a couple of fairleads to her stern, but it was nice to be part of it.

Germaine RiggingAs Ron eased her into the water using the mobile boat hoist, the rigger and his team rigged up the very complicated looking gaff rig on her mast in an impressively short order. The was hoisted into place and suddenly she was ready for her first voyage across the lake to Haven Marina. We waved her off and cheered.

Germaine Stepping Mast

Germaine Afloat

Germaine’s next stop will be Douarnenez later this summer when her rigging and sails have been completed.

Gerald, Scarph

Tern
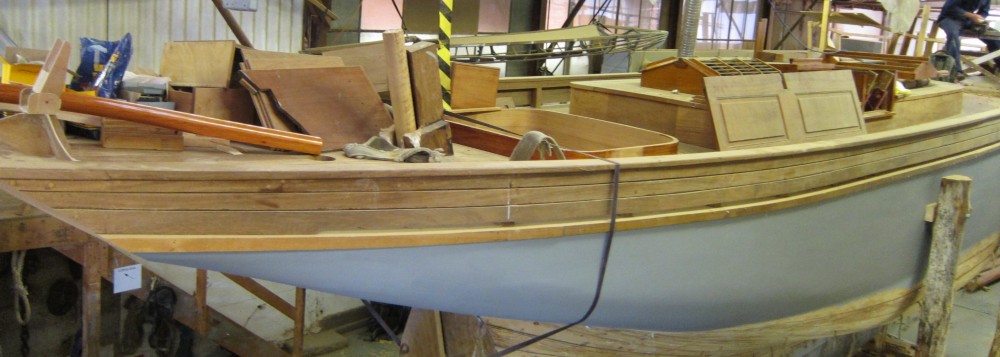
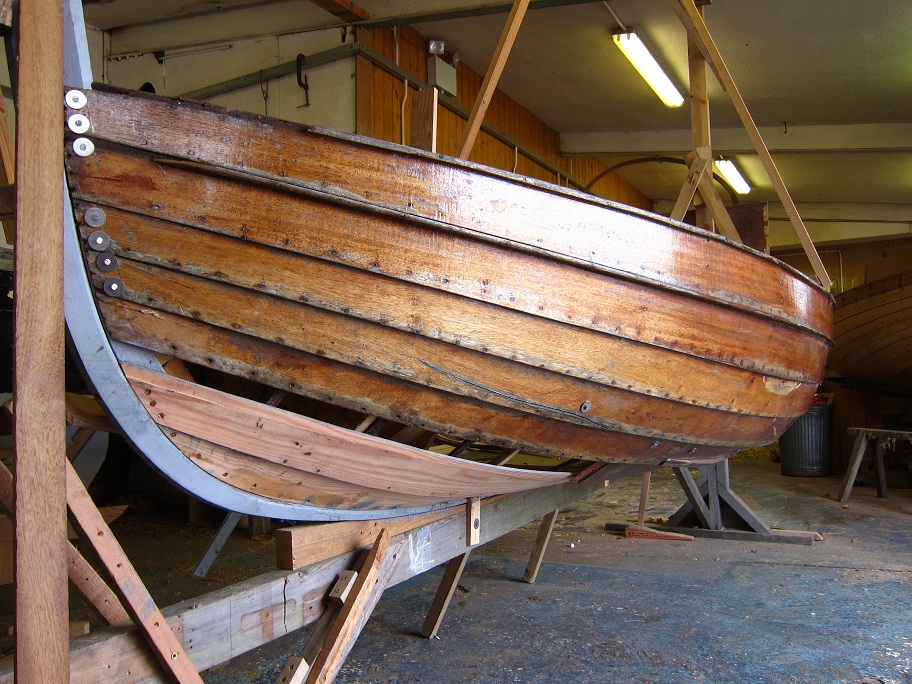
Tern is a 12 foot rowing boat with larch planks. Her original planks are dry, brittle and rotten, but a new boat is slowly emerging. A bit like the Victory, but at a (slightly) faster pace; there won’t be much left of the original but she’ll look like the same boat. It’s a great example of what IBTC can do; rebuilding boats that wouldn’t have a chance anywhere else.

I’ve taken over the clinking planking exercise from Zac, who’s gone off to the real world to earn an honest living. My mission is to make a plank that will run from the stem and will join to one of the existing planks with a feathered scarph joint.

As Pete the tutor was enthusiastically explaining the fiendishly complicated process of making a new plank where there is currently just a gap, the main thought going through my head was “can you just do it and I’ll watch?”, but that’s not how you get to be a boat builder, so I decided to just get on with it one stage at a time and see what happened.

The first stage is to get some idea of the shape of the plank that you’re going to make. For that you need a spiling board, which consists of a few bits of old plywood stuck together in the approximate shape of the required plank, on to which you can mark any lines that might be useful. I drew along the top edge of the plank below to get started, and drew some projection lines to represent some measurements that Zac had taken of the missing plank above.

Then I got a chance at last to use the dummy sticks that we made on the last day in the joinery shop, and were assured at the time that they would be very useful. Dummy sticks are rectangles of plywood of various sizes which are used to transfer lines from one place to another, and now I had a line I could copy it onto the piece of larch selected for the new plank.

Once the plank section had been cut roughly to shape it was time to get out the steamer, which is still a bit magical. The new plank section is wrapped up in a bit of plastic tarpaulin and attached by a tube to a wallpaper steamer. After 30 minutes, the plank can be bent to your will (within reason) and held in place with G-cramps.

It’s amazing how a curved plank has a completely different shape from a flat piece. It’s lucky I allowed a bit spare along the edges as my original lines bore little relation to the shape of the boat once it was steamed.

Feathered scarph

Feathered scarph

Now that the plank section was curved I could join it to the aft end of the plank with a feathered scarph. It’s important to get your scarph the right way round, the forward plank should overlap the aft plank so that the water flows over it rather that scooping it up and  gradually opening up the joint.

Gerald

Gerald at the stem

Now comes a long succession of clamping the plank on to the boat to check the fit and taking it off again to make appropriate adjustments. It has to be shaped along its length, it needs to sit flush on the brow of the plank below, and at the stem and transom, which are where another devilish joint comes in, known as a ‘gerald’. A gerald slopes in two directions: along the length of the plank and across it, but at any point along its length it has to be flat so that the plank above sits flat on it to ensure a watertight joint (rather important in a boat). In Boat Building Techniques Illustrated, Richard Birmingham says:

Because of the changing angles, this is not an easy joint to cut; it is achieved with a rebate plane, chisels and care. It also improves with practice.


I used to think this was a warning to take your time, but now I see it as an aspiration

I used to think this was a warning to take my time, but now I see it as an aspiration.

It’s the details that really take the time in boat building; I got the plank to shape quite quickly, but have spent days working on the contact points with the rest of the boat. It’s also got to be symmetrical with the plank that Alan is making for the other side before we get the sign off to nail and rove them in place. The final hurdle is Pete’s unfailing critical eye which homes in on every error and omission and makes you wonder how you ever missed them. Wishful thinking maybe.


.

Countdown to Launch

StemBandIf you hang around long enough in the IBTC boat shed at the moment you get a job on Germaine. She’ s a beautiful Camper and Nicholsons cruising yawl, built in 1882, and has been in the boat shed since 1997; but not for much longer. It’s all hands on deck to get her ready for the big day when she gets back in the water again. She’s taking shape rapidly, and I’ve been hoping that I would get the chance to do some work on her before she goes.

One afternoon when everything on Naiad was either being bonded with Arbokol or was covered with wet varnish, I went and volunteered my services. The first task was fitting a galvanised steel band to her stem. It went on with a bit of persuasion using a 10 foot bit of 6 x 4 wedged in a groove in the floor of the boat shed as a shore and plenty of Arbokol. I was concerned that I might start the launch early as I levered the band against Germaine’s stem, but she stayed firm.

AirVentInsertThe next job was to install an air vent in the coach roof, which required rather less brute force. Starting with a lump of mahogany, the first task was to make a cylindrical insert that would look tidy and fit in with the beautifully crafted internal fit out. The outside profile was quite straightforward to cut on the lathe after getting the block of wood roughly cylindrical. Cutting the hole out of the middle was a delicate operation, as it would leave the walls of the tube quite thin and therefore there was a risk of it collapsing. I secured it in the drill vice and held my breath as I cut into it with a hole saw on the pillar drill. When I got half way through, I turned it over and drilled from the other end. It held together without collapsing and joined in the middle; not quite as major an achievement as digging the Channel Tunnel, but not far off.

The next scary bit came when I had to use a hole saw to cut a hole in the teak deck on the coach roof to put the vent tube in; I must have measured it about 10 times before committing myself with the saw, but in the end I just had to get on with it. Cutting a big hole through the roof exposes end grain, so I sealed the inside of the hole with epoxy, and stuck the insert in with mastic. The rest of the job was straightforward and just involved screwing things together and sealing them with mastic.

AirVentTopI’m looking forwards to Germaine’s launch next month; it will be a major operation getting her out of the boat shed, with lots of rearrangement of boats required. She will leave a big hole as she’s been an imposing presence in the boat shed for a long time, but I’m glad I got to do a bit of work on her before she leaves.

Stammtisch


Tea time at IBTC

Tea time at IBTC

There was a leaving do at IBTC this week; every few months the college lays on some beer, wine, bread and cheese to launch another new batch of boat builders into the real world, it’s a fine spread and usually timed to coincide with welcoming a new intake. Class 113 started this week and we got to meet them at the first tea break on Monday. They came in looking a bit quiet and nervous as I’m sure we all did when we started, they got their teas and … horror! sat at the table reserved by the old lags; this is the table where the senior students sit and pontificate on boat building and the world in general while we all sit in awe. Sitting at their table with them would surely be frowned upon at the very least? What would happen? Well … nothing;  because it soon became apparent that there aren’t any seniors any more, or that is to say, we are them. So what advice could I pass on to the new boys from this exulted position? Apart from having a good supply of plasters (my thumb is still sporting a tatty one as I type) and Ibuprofen for back pain (if you’ve come from an office job), the main thing you need for boat building is patience.

Naiad_centreboard_case

Naiad’s centreboard case

Michael and I have been working on Naiad for a couple of months now, every job seems to lead to lots of other jobs; there’s always something to snag, or varnish or prime before something else can be reassembled. Learning to do things in the right order helps, but even then it’s labour intensive and time consuming. Naiad is gradually rising again from the rotted planks and timbers which made her so fragile when we first got on board. She’s quite robust now with new timbers and reconstructed centreboard case. The thwarts are nearly ready to go back in permanently when we’ve successfully aligned and drilled all the nail and screw holes through the knees, thwarts and risers to hold them all together. There’s plenty more to do, but it has become what we do all day; there doesn’t seem to be much progress day by day, but it all adds up, and we love it.

One of the jobs I particularly enjoyed was rebuilding the thwart knees which had broken at each end. This was partly due to a fault with the original manufacture, in that they had short grain at the extremities, so were prone to snapping. But to be fair, they have been on the boat for a long time doing their job of supporting the thwarts. I made replacement ends from oak and bonded them on with epoxy. The top end has a tenon inside to support it, and the bottom end has a scarph joint. It’s still short grained at the thick end, but the grain runs along the bottom end. I wonder how long they’ll last before they need patching up again.

Wounded knee: spot the surgery

Wounded knee: spot the surgery

Bring a knife

TurksHeadIt’s not the kind of invitation that I get every day, but the note was quite clear on this singular requirement. We duly assembled in the GRP workshop on the appointed day last week with our blades, but it was for nothing more sinister than knots and splices training with a bit of whipping thrown in for good measure. As a lot of the elements of a wooden sailing boat that aren’t held together by nails are attached by bits of string, this is an important thing to know about. We warmed up with some splicing; a good way of finding out to find out how ropes are made by taking them to bits and putting them back together. We used 3 strand manila, which is a simple rope to work with when learning to splice. We made an eye splice, a back splice and an end-to-end splice.  An eye splice is a way of making a strong and permanent loop in the end of a rope; it’s much stronger than a bowline: an eye splice has 80% of the strength of the rope whereas a bowline only has 45%. A back splice is a good way to tidy up the end of a rope and stop it from unlaying. An end-to-end splice is used to join ropes together. We also learned to make a deck quoit (properly known as a grommet, prompting a brief rendition of the class 111 theme tune).

Whipping is a way to bind the components of a rope together to stop it from fraying or unravelling by wrapping them with thread. We looked a bit like a rather scruffy Mother’s Union sewing circle as we sat there with our needles and palms threading whipping twine and chatting about rope lore and philosophy. The pros and cons (mainly cons) of the effectiveness of the thief knot in preventing maritime crime was considered, and the alternatives to being skilled at knots: ‘if you can’t tie knots tie lots’. Knot literature was also discussed; Des Pawson’s seminal work on the subject was highly recommended, giving instruction on making everything from a Portuguese sennit to a cat-o’-nine tails. Des also has the distinction of looking as if he’s made of string.

ZacHangingAboutThe next day we got to test out our knot tying skills to the limit. After a warm up on various bends (knots that join ropes together) and hitches (temporary knots), in true IBTC style we put our skills to immediate practical use by using rolling hitches to climb the boat gantry on the hard at the back of the boat shed and not killing ourselves.

Braid-on-braid is a 100% polyester rope that is the most popular type of rope for halyards (used to pull things up and down on boats) and sheets (used to trim and set sails). It’s a bit more complicated to work with than 3 strand, but having survived the gantry climb, we were up for the challenge. We put an eye in braid-on-braid, which was a bit like performing an intestine operation and splicing braid-on-braid to wire, which is just plain fiendish.

Another thoroughly enjoyable and informative course presented by Rob; it’s becoming a habit.

Messing About in Boats

Annie on test

Annie on test

“There is nothing, absolutely nothing half so much worth doing as simply messing about in boats” says Rat in the Wind in the Willows. I guess that many of us at IBTC must share this sentiment as we spend every day messing about in boats. At the moment we generally do so in a freezing cold boat shed, rather than sculling along the river with a wicker luncheon basket full of cold chicken, ginger beer and other goodies.

The boat that Michael and I spend all day in is Naiad, but she’s laden with tools and bits of wood that have either been taken off or are being put on. In the past few weeks we have replaced 17 of her timbers with copies that we fashioned out of 2 slices of an oak tree, we’ve roved in over 200 copper nails to hold the timbers to Naiaid’s planks and we’ve started reassembling the centreboard case.

The Artful Dodger

The Artful Dodger

Messing about in boats took on a more Wind in the Willows turn this week when we went out to Lake Lothing on a sunny afternoon for the test launch of two recently completed boats: ‘Annie’, a river Cam skiff from around 1908 that has been restored after her bottom almost rotted away and a newly built Herreshoff Columbia dinghy

The lifeboat wasn't required this time

The lifeboat wasn’t required this time

called ‘Artful Dodger’. It was a tense moment as they were carefully lifted into the lake, but both were pronounced dry and we took them out for a spin to see how they performed. They are both great little boats for a day out on the river, light to row, and look great with their highly varnished finishes. It was a brief foretaste of summer in the middle of winter. We went back to the boat shed with a spring in our step (or was it the sea weed that was helpfully stuffed into the boots left on shore during our brief river excursion).

Breaking Glass

Dave conducting impact research

Dave conducting impact research

On a cold morning last week, IBTC class 111 gathered outside the boat shed in white suits and solemnly took it in turns to smash glass fibre hulls to pieces with a hammer. It wasn’t a wooden boat builders’ anti-plastic-boat ritual; it was all in the name of educational research and definitely not at all for fun.

To rewind a bit, we had spent the week under the guidance of Rob, trying out glass reinforced plastic (GRP) hull manufacture and repair; just in case we’re ever tempted to work with boats that aren’t completely made of wood. The first thing to learn about GRP construction is that everything is done backwards: first you wax it, then you apply the outer finish, then you lay on the construction materials.

Coming out of the mould

Coming out of the mould

We started with a two part mould of  the bow section of a boat that we polished with mold release (so that our bow sections would drop out of the moulds with ease), then applied two layers of gel coat (it does seem strange to paint something that doesn’t exist yet). Then we applied alternate coats of polyester resin, and chopped strand mat until the layer cake seemed quite substantial. Then we had to leave it for the night. The next morning the bow sections popped out of the mould and looked perfect until they had their first appointment with a hammer. The structure of gel coat, polyester resin and chopped strand mat can take quite a hammering, but if there’s an air gap between the gel coat and the mat, the gel coat just flakes away, and it doesn’t look so pretty.

Building a base for an external repair

Preparation for an external repair

The damage had only just begun; the next step was to cut some holes in our (not quite so perfect) work so that we could try out some repairs. In one repair we were allowed access to the inside of the hull and in the other we were not, so we had to do the whole repair from the outside (quite likely in a boat repair when the insides haven’t been stripped out). The principles of both repairs were the same: make a negative of the hull shape required, tidy up the edges of the damaged area, file the edges to a razor sharp edge, and then build up the layers of resin, chopped strand mat and gel coat. The difficulty most of us faced was getting the depth of the repaired area to match that of the original structure, so when we started sanding it smooth, we lost too much gel coat and the resin showed through.

GrpChemicalsRob did a great job presenting the course, and the advantages of working with GRP were clear: strong, light structures with a perfect(ish) finish are quick to produce and easily scalable for mass production. One of the downsides is the requirement to work with a heady mix of chemicals with scary looking warning labels on them. I have to say that on balance I’d rather stick with wood.

By the way, the result of the impact testing was that the external repair was generally the first to cave in, usually because the backing plate wasn’t attached strongly enough, but even that took an impressive beating before giving in.

Class 111 during GRP training

The IBTC Teletubbies

You say router and I say router

RouterTableWhen I look back on some of my old posts from the joinery shop, I see that we used hand tools to make everything. Now that’s history because Andreu, Michael, Rod, Zac and I spent the last week under the watchful eye of Ian, building tables for our routers.

My dictionary gives the follow definition of the verb to ‘rout’:

cut a groove, or any pattern not extending to the edges, in (a wooden or metal surface)

but this only scratches the surface (sorry) of the capabilities of the router and router table combo; my planes are now gathering dust on the shelf.

The router table went together very quickly, and the router itself was an essential part of its construction. Many grooves not extending to the edges were cut, and even some that did reach the edge (also known as ‘rebates’). When it came to putting the surface on our table tops, there was a bonus: Ian brought out some sheets of walnut Formica that were ordered specially (or was that ‘found in the back of the cupboard’?).

IanWhen we’d built the tables, Ian showed us some of its capabilities; which are quite extensive. You can spend a fortune on router cutters and jigs to cut letter boxes, kitchen work surfaces  dovetail joints, skirting boards, tongue and groove, the list goes on; in fact Axminster have a whole section just on routing (none of their router tables have walnut tops though). While there’s not much that can be done to avoid the cost of cutters, Ian encouraged us to think about making our own jigs as attachments to the table. He showed us a whole range of jigs that he has made over a lifetime in joinery and hinted at some he has made that no one else has thought of yet; but we didn’t get to see them.

My first job after the router table workshop was to shape some more timbers for Naiad. Normally I’d reach for my plane for this job, but I thought I’d see if I could do it on the router table. A fair amount of trial and error was involved, and some of my test pieces got a bit chewed up, but once I’d got it set up, I was churning out shaped timbers at quite a lick (and I still have all my fingers). It got me thinking about my first idea for a jig which would make the setting up quicker; but it’s still on the drawing board; I expect Ian already has one.